
Why You’ll Love this Mom’s Signature Red Cake
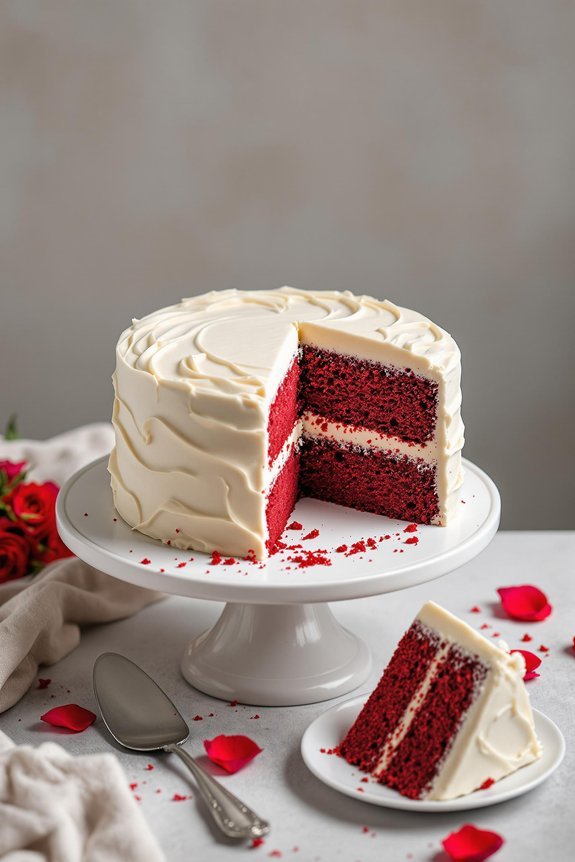
When I think about truly special desserts that create lasting memories, my mom’s signature red velvet cake sits firmly at the top of that list.
It’s not just the stunning crimson color that makes it irresistible, but that perfect balance of subtle cocoa flavor with tangy buttermilk.

What makes this recipe shine? The incredibly moist crumb that practically melts in your mouth.
And that frosting—oh, that frosting. Velvety smooth, not too sweet, with a richness that complements rather than overwhelms the cake itself.
Trust me, this isn’t just cake. It’s edible nostalgia.
What Ingredients are in Mom’s Signature Red Cake?
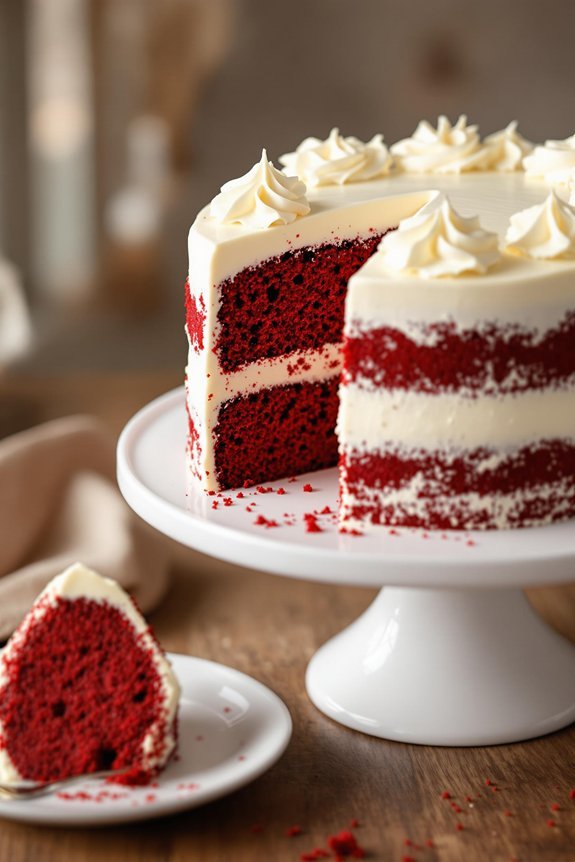
Mom’s signature red velvet cake is all about that perfect balance of flavors and that stunning crimson color that makes everyone’s eyes widen when you bring it to the table. The ingredients list might look a bit long at first glance, but don’t let that intimidate you—each component plays an essential role in creating that velvety texture and distinctive taste that’s made this cake a family favorite for generations.
- 2¼ cups sifted cake flour
- 1 teaspoon baking soda
- ½ cup vegetable shortening (such as Crisco®)
- 1½ cups white sugar
- 2 eggs
- 1 (1 ounce) bottle red food coloring
- 1 fluid ounce water
- 2 tablespoons unsweetened cocoa powder
- 1 cup buttermilk
- 1 teaspoon salt
- 1 teaspoon vanilla extract
- 1 tablespoon apple cider vinegar
- 2 cups milk
- ¼ cup all-purpose flour
- 2 cups butter, softened
- 2 teaspoons vanilla extract
- 2 cups white sugar (for frosting)
A few notes about these ingredients that might help you plan ahead: the buttermilk is absolutely vital for that tangy flavor and tender crumb, so I wouldn’t recommend substituting it.
And while the amount of red food coloring might seem startling, it’s what gives this cake its signature dramatic color. For those concerned about artificial colors, there are natural alternatives available, though the shade might be slightly different.
The frosting ingredients (milk, flour, butter, vanilla, and sugar) create that magical, not-too-sweet frosting that sets this recipe apart from cakes with standard cream cheese frosting.
How to Make this Mom’s Signature Red Cake
To make this showstopper of a cake, start by preheating your oven to 350°F and preparing two 9-inch round cake pans by greasing and flouring them. In a medium bowl, sift together the 2¼ cups of cake flour and 1 teaspoon of baking soda, then set aside. This step might seem fussy, but sifting prevents those dreaded flour lumps that can ruin the velvety texture we’re aiming for.
Next comes the colorful magic that gives red velvet its name. In a small bowl, mix together 1 ounce of red food coloring, 1 fluid ounce of water, and 2 tablespoons of unsweetened cocoa powder until smooth.
Meanwhile, in a large bowl, cream together ½ cup of vegetable shortening and 1½ cups of white sugar until light and fluffy, about 5 minutes. Add 2 eggs one at a time, beating well after each addition, then stir in the red food coloring mixture.
Now, working in alternating batches, gradually blend in the flour mixture and 1 cup of buttermilk, beginning and ending with the flour. Finish the batter by stirring in 1 teaspoon of salt, 1 teaspoon of vanilla extract, and 1 tablespoon of apple cider vinegar—don’t worry, you won’t taste the vinegar, but it reacts with the baking soda to create that perfectly tender crumb.
For that signature frosting that makes this cake truly special, you’ll need to plan ahead a bit. In a saucepan, whisk 2 cups of milk with ¼ cup of all-purpose flour over medium heat until thick, then cool completely.
Once cool, beat 2 cups of softened butter with 2 cups of white sugar for about 10 minutes until incredibly light and fluffy, then add 2 teaspoons of vanilla extract and gradually beat in the cooled milk mixture. Beat until it resembles whipped cream—this might take another 10 minutes, but trust me, the silky result is worth every second.
After your cake layers have cooled completely, spread this heavenly frosting between layers and over the top and sides. For the most dramatic presentation, refrigerate for at least an hour before serving to let the flavors meld and make slicing easier.
Mom’s Signature Red Cake Substitutions and Variations
Although this classic red velvet recipe has stood the test of time, you might need to make some adjustments based on what’s in your pantry or dietary needs. Can’t find buttermilk? Mix a tablespoon of lemon juice with regular milk and let it sit for 5 minutes. Out of food coloring? Beet juice works wonderfully for a natural alternative.
For a dairy-free version, swap butter with coconut oil and use almond milk mixed with vinegar instead of buttermilk. Gluten-free bakers, try a one-to-one flour blend. Want less sugar? Reduce by up to 25% without sacrificing that nostalgic taste.
What to Serve with Mom’s Signature Red Cake
While red velvet cake stands perfectly fine on its own, pairing it with complementary foods and beverages can elevate your dessert experience to new heights.
I recommend serving it with a scoop of vanilla bean ice cream or freshly whipped cream, which balances the subtle cocoa notes beautifully.
For drinks, try coffee (hot or iced), milk, or even champagne for special occasions.
The cake’s rich texture pairs wonderfully with berries too—strawberries or raspberries add a tart contrast.
Want something unexpected? A small cheese plate with mild options like brie can create a sophisticated sweet-savory combination that your guests won’t forget.
Final Thoughts
After making Mom’s Signature Red Velvet Cake countless times, I’m convinced it’s more than just a recipe—it’s a family treasure worth passing down through generations. The vibrant color, velvety crumb, and that distinctive not-quite-chocolate flavor creates something magical that store-bought versions can’t touch.
Isn’t it funny how certain recipes become part of our identity? This cake has graced birthdays, celebrations and sometimes, just because it’s Tuesday. The recipe might seem fussy with its bottle of food coloring and specific instructions, but oh, the results are so worth it. Some traditions deserve preserving, don’t you think?
Printable Recipe Card
Want just the essential recipe details without scrolling through the article? Get our printable recipe card with just the ingredients and instructions.