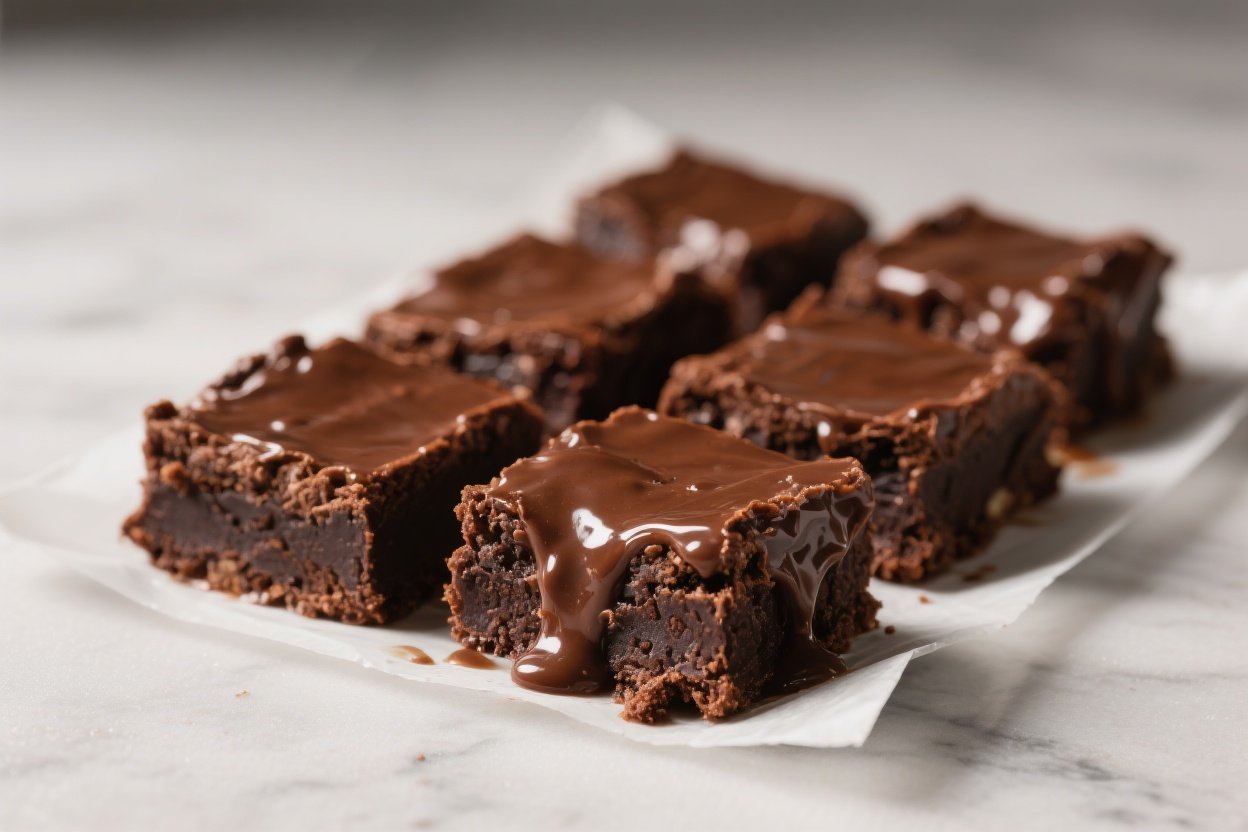

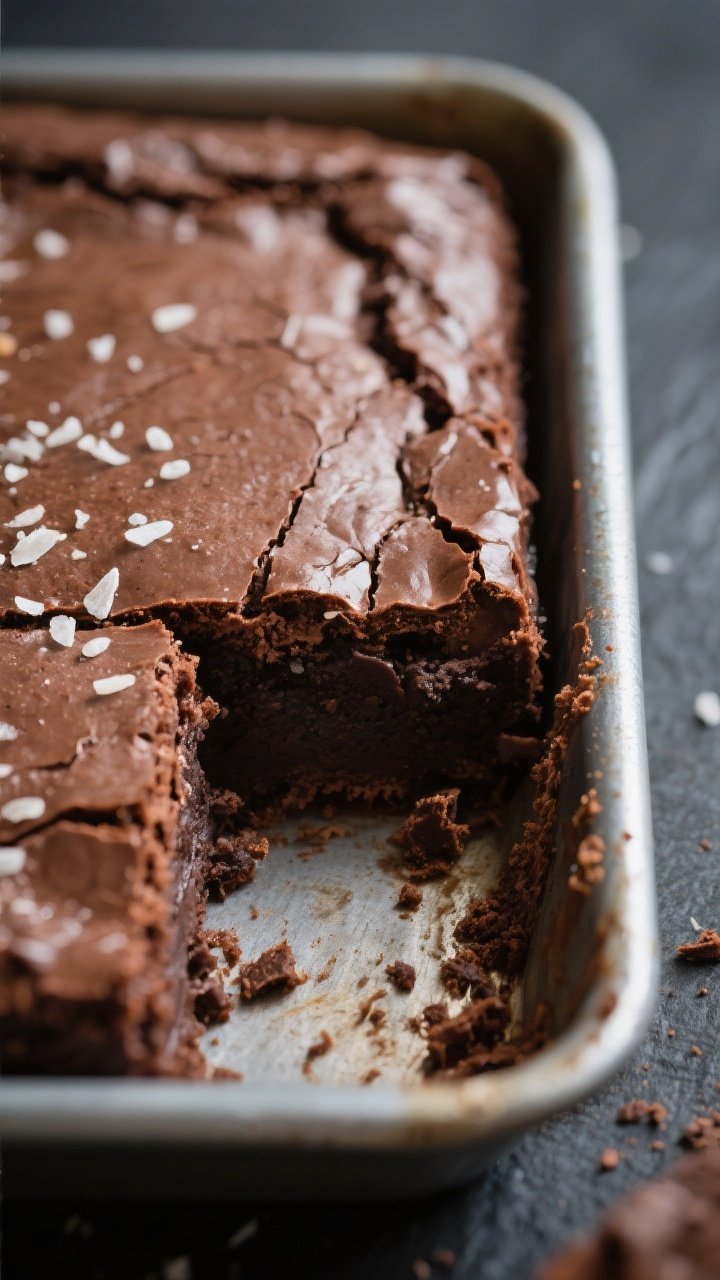
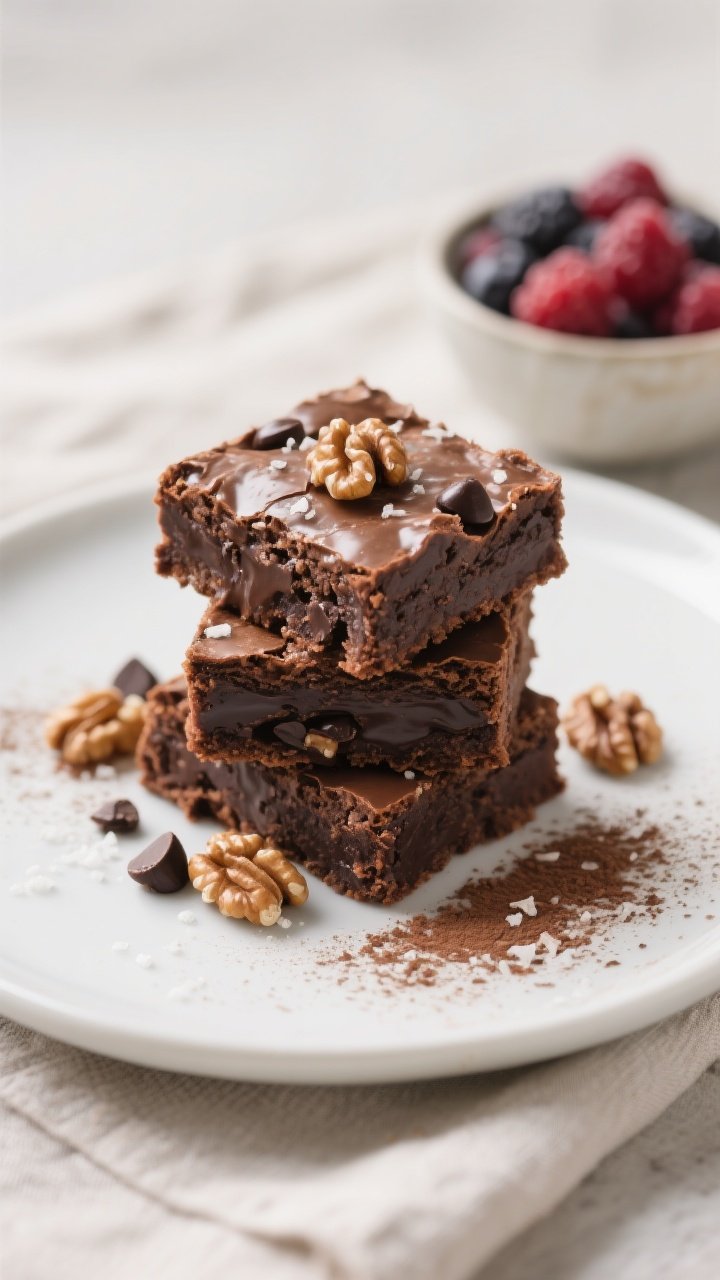
If you’re craving something chocolatey with a melt-in-your-mouth center and a shiny, crinkly top, these gooey brownie bars hit the spot. They’re simple to make, big on flavor, and perfect for sharing—or not. You’ll get that deep cocoa taste, a chewy edge, and the soft, fudgy middle everyone loves.
No fancy equipment or tricky steps, just reliable, bakery-style brownies from your own oven. Keep this recipe handy for birthdays, bake sales, or those nights when only chocolate will do.

What Makes This Recipe So Good
- Deep chocolate flavor: A mix of melted chocolate and cocoa powder gives these bars a rich, intense taste.
- Perfect texture: Chewy edges and a gooey center, thanks to the right balance of fat, sugar, and minimal mixing.
- Shiny, crinkly top: Whisked eggs and sugar help create that classic brownie crust.
- Pan-friendly: Baked in a standard 8×8-inch or 9×9-inch pan, so you get thick, satisfying squares.
- Customizable: Add nuts, chocolate chips, espresso, or a swirl of peanut butter—this base handles it all.
Ingredients
- 1/2 cup (113 g) unsalted butter
- 6 oz (170 g) semi-sweet chocolate, chopped (or chips)
- 3/4 cup (150 g) granulated sugar
- 1/2 cup (100 g) packed brown sugar
- 2 large eggs, at room temperature
- 1 large egg yolk, at room temperature
- 2 teaspoons vanilla extract
- 3/4 cup (90 g) all-purpose flour
- 1/4 cup (20 g) unsweetened cocoa powder (natural or Dutch-process)
- 1/2 teaspoon fine sea salt
- Optional mix-ins: 1/2 cup chocolate chips, chopped nuts, or 1 teaspoon instant espresso powder
- Optional finish: flaky sea salt, for sprinkling
Step-by-Step Instructions
- Prep the pan: Heat oven to 350°F (175°C). Line an 8×8-inch or 9×9-inch metal baking pan with parchment, with overhang for easy lifting.
Lightly grease the parchment.
- Melt butter and chocolate: In a heatproof bowl, melt the butter and chopped chocolate together over a saucepan of simmering water, stirring until smooth. Or microwave in 20–30 second bursts, stirring between each. Set aside to cool for 3–4 minutes.
- Whisk the sugars and eggs: In a large bowl, whisk granulated sugar, brown sugar, eggs, and egg yolk for about 1 minute until slightly thick and glossy.
This helps build that shiny top.
- Add vanilla and chocolate mixture: Whisk in vanilla, then slowly pour in the melted chocolate-butter mixture, whisking until fully combined.
- Fold in dry ingredients: Sift or whisk together flour, cocoa powder, and salt. Gently fold into the batter with a spatula until just combined. Do not overmix. Stir in any optional mix-ins.
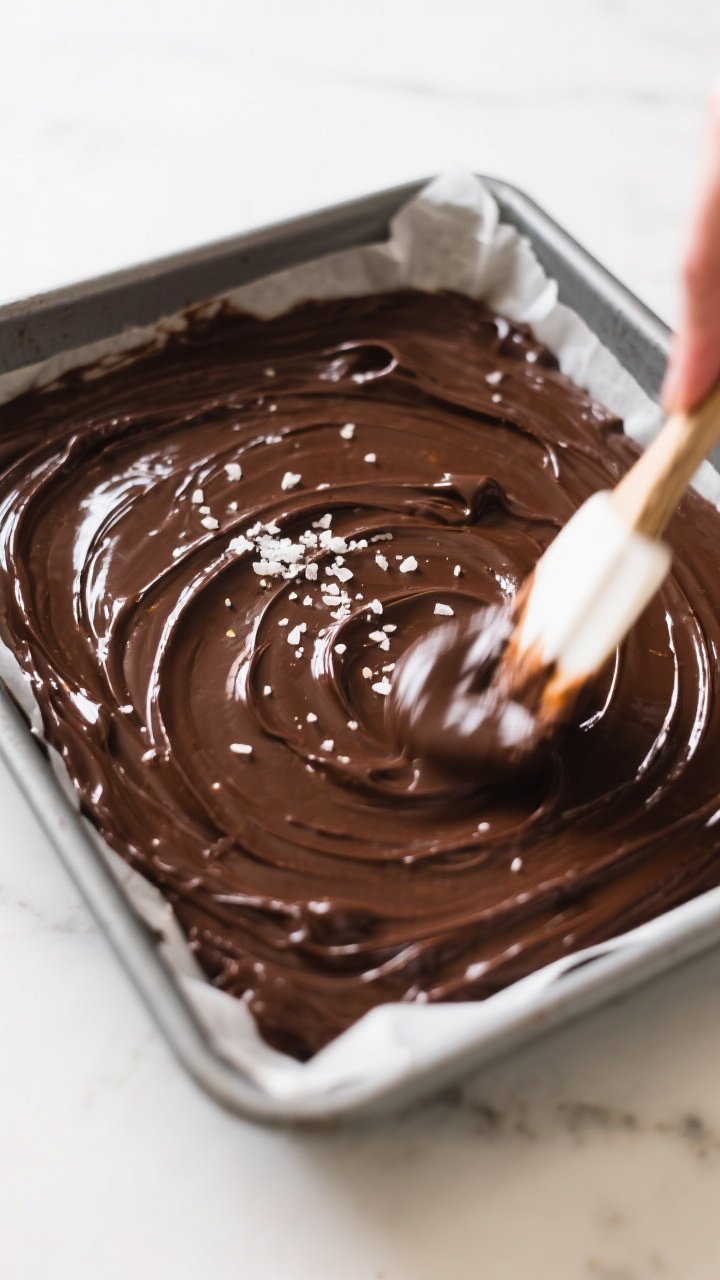
- Spread and smooth: Scrape batter into the prepared pan and smooth the top. If you like, sprinkle a pinch of flaky sea salt.
- Bake: Bake 22–28 minutes for an 8×8 pan (a bit less for 9×9), until edges are set and a toothpick inserted 2 inches from the edge comes out with moist crumbs.
The center should look slightly underbaked—this keeps it gooey.
- Cool before slicing: Let the brownies cool in the pan on a rack for at least 45–60 minutes. For the cleanest slices, chill for 30 minutes, then lift out and cut into bars with a sharp knife, wiping between cuts.
- Serve: Enjoy at room temperature for maximum fudginess, or warm slightly for extra gooey texture.
How to Store
- Room temperature: Store in an airtight container for 3–4 days. Place parchment between layers to prevent sticking.
- Refrigerator: Keeps for up to 1 week.
Chill if your kitchen is warm or if you prefer a firmer, fudgy bite.
- Freezer: Wrap individual bars in plastic, then place in a freezer bag. Freeze up to 2 months. Thaw at room temp or microwave in 10–15 second bursts.
Health Benefits
Brownie bars are a treat, but you can still find a few bright spots.
Dark chocolate offers antioxidants like flavanols, which may support heart health. Cocoa also contains minerals such as magnesium and iron. Eggs add protein and fat-soluble vitamins, which help with satiety.
If you choose nuts as a mix-in, you’ll increase healthy fats and a bit of fiber. Enjoy in moderation, pair with fruit, and savor each bite—mindful eating goes a long way.
Common Mistakes to Avoid
- Overbaking: If you wait for a clean toothpick, you’ll get cakey, dry brownies. Pull them when the center still looks slightly soft.
- Overmixing the batter: Too much stirring after adding flour creates tough brownies.
Fold gently just until no dry streaks remain.
- Skipping the cool time: Cutting too soon makes a mess and collapses the gooey center. Let them set up before slicing.
- Using a glass pan without adjusting: Glass bakes hotter on the edges. If using glass, reduce the oven temperature by 25°F and keep a close eye on doneness.
- Not measuring correctly: Too much flour equals dry brownies.
Use a scale or spoon-and-level method to measure flour and cocoa.
- Melting chocolate on high heat: Chocolate can seize or burn. Melt low and slow, and stir often.
Recipe Variations
- Salted caramel swirl: Dollop 1/3 cup thick caramel sauce over the batter and swirl with a knife. Sprinkle flaky salt.
- Mocha brownies: Add 1–2 teaspoons instant espresso powder to the dry ingredients to boost the chocolate flavor.
- Peanut butter ribbon: Warm 1/3 cup peanut butter until pourable, swirl into the batter before baking.
- Triple chocolate: Fold in white and milk chocolate chips along with dark chocolate chunks.
- Nutty crunch: Add 1/2 cup toasted walnuts, pecans, or hazelnuts for texture and a toasty note.
- Gluten-free: Swap the flour for a 1:1 gluten-free baking blend.
Bake time may vary slightly; check early.
- Dairy-free: Use vegan butter and dairy-free chocolate. The texture will still be rich and fudgy.
FAQ
How do I know when gooey brownies are done?
Look for set edges and a center that’s slightly soft and glossy. A toothpick inserted near the edge should come out with moist crumbs, not wet batter.
The center will continue to firm up as it cools.
Can I double the recipe?
Yes. Use a 9×13-inch metal pan and add a few extra minutes to the bake time. Start checking around 28–32 minutes and look for the same visual cues.
Why don’t my brownies have a shiny top?
Whisking the eggs and sugar until slightly thick helps, as does using both melted chocolate and sugar.
Avoid overmixing once the flour goes in, and make sure the batter is well combined before adding dry ingredients.
What’s the best cocoa to use?
Both natural and Dutch-process cocoa work here. Dutch-process gives a smoother, deeper chocolate flavor, while natural cocoa is a bit brighter. Use what you have and enjoy.
Can I reduce the sugar?
You can cut the sugar by about 1/4 cup total, but texture and shine may suffer slightly.
Sugar adds moisture and contributes to the crackly top.
How do I get clean slices?
Cool completely, chill for 30 minutes, and use a sharp knife. Wipe the blade between cuts. A warm knife (briefly run under hot water and dried) helps create neat edges.
Should I use chocolate chips or chopped chocolate?
Either works.
Chopped bars often melt more smoothly and create varied pockets of chocolate. Chips hold their shape a bit more. Choose your preferred texture.
Can I make these brownies less gooey?
Yes.
Bake a few minutes longer until the center looks more set and the toothpick near the middle has damp crumbs instead of very wet ones. Don’t overdo it or they’ll turn cakey.
Final Thoughts
These gooey brownie bars deliver everything you want from a classic, no-fuss recipe: deep chocolate flavor, a crinkly top, and a soft center that keeps you coming back for another square. They’re weeknight simple yet impressive enough for guests, and they handle mix-ins like a champ.
Keep the ingredients in your pantry and you’ll always be a short bake away from warm, fudgy comfort. Happy baking—and don’t forget the pinch of flaky salt on top.
Printable Recipe Card
Want just the essential recipe details without scrolling through the article? Get our printable recipe card with just the ingredients and instructions.