
Ready to bake the prettiest cakes on the internet? These five vintage heart cake designs are pure nostalgia with a modern glow-up—think ruffles, swags, pearls, and buttery pastels. And yes, we’re diving into the Lambeth piping style that makes everyone go, “Wait… you made that?”
We’ll keep it friendly and doable, even if a piping bag makes you sweat. You’ll get clear instructions, exact ingredients, and pro tips so your cakes look like a million likes. Grab your offset spatula and let’s play with buttercream.
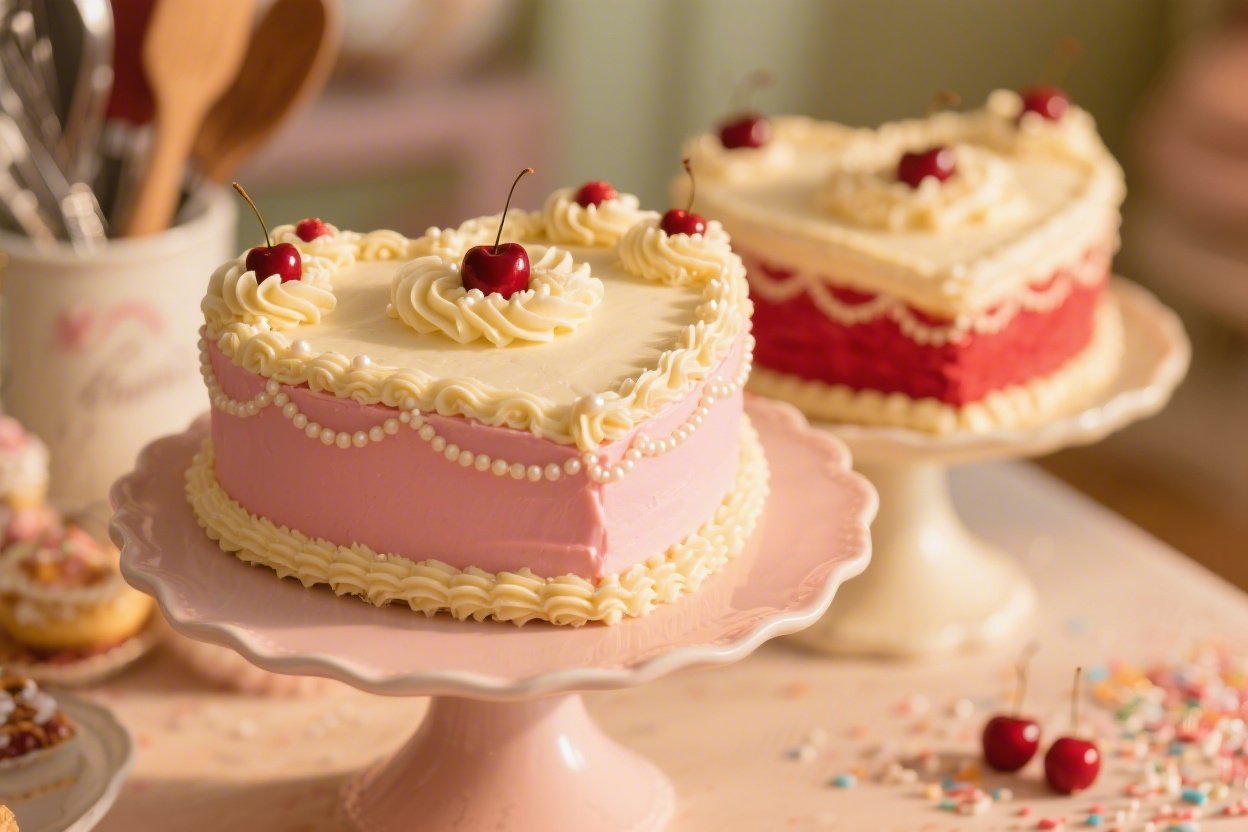
1. Pastel Sweetheart With Pearled Swags (Beginner-Friendly Lambeth Layers)
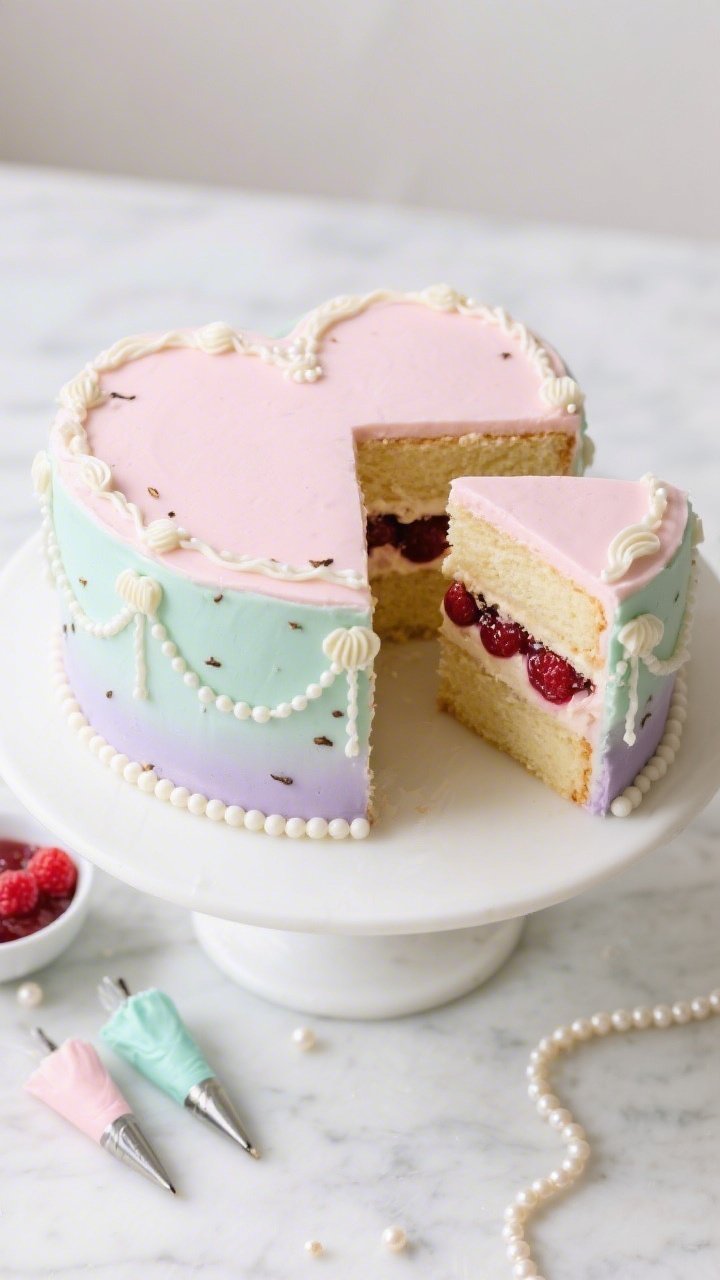
This is the gateway vintage heart cake—soft pastels, tidy swags, and sugar pearls for instant elegance. It’s perfect for birthdays, showers, or that friend who “doesn’t like cake” and then eats two slices.

Ingredients:
- Two 8-inch heart-shaped vanilla cakes, baked and cooled
- 1 1/4 cups whole milk (for cake if baking from scratch)
- 1 tbsp vanilla bean paste
- 2 cups seedless raspberry jam (filling)
- 2 1/2 cups unsalted butter, room temp
- 8 cups powdered sugar
- 1/4 cup heavy cream (plus more as needed)
- 1 tsp almond extract (optional)
- Gel food coloring: blush pink, lavender
- Edible sugar pearls
- Pinch of fine salt
Instructions:
- Level and chill. Trim cake tops flat. Chill layers 20 minutes so they’re sturdy.
- Make buttercream. Beat butter until pale and fluffy (3–4 minutes). Add powdered sugar in three additions with salt. Stream in cream, vanilla, and almond extract. Beat until silky. Divide and tint 60% blush pink, 30% lavender, 10% left white.
- Fill and crumb coat. Pipe a pink buttercream dam around the edge of the bottom layer. Spread jam inside. Top with second layer. Thin coat the whole cake with pink. Chill 30 minutes.
- Smooth coat. Add a thicker pink layer. Smooth with an offset spatula and bench scraper. Chill 15 minutes.
- Basic Lambeth swags. Fit a piping bag with a small open star tip (Wilton 18). With lavender, pipe gentle U-shaped swags around the top edge, meeting at tidy points. Echo a second row of smaller swags just above the first.
- Pearls and borders. Using white buttercream and the same tip, pipe a shell border along the bottom. Press sugar pearls at each swag joint and along the top rim.
- Optional message. Use a small round tip (Wilton 2) to pipe a tiny “Sweetheart” or initials in the center.
Serve it pretty: Keep the palette soft and let the pearls do the talking. Swap raspberry jam for lemon curd if you want a brighter bite. Pro tip: Practice swags on parchment first—10 passes and your hand will “get it,” trust me.
2. Cherry Cola Diner Heart With Whipped Ruffles

Retro soda-fountain vibes, but make it cake. This one brings cherry-cola chocolate layers, whipped ruffle borders, and a glossy cherry crown. It’s flirty, fun, and dangerously snackable.
Ingredients:
- Two 8-inch heart-shaped chocolate cakes
- 1/2 cup cola (for brushing layers)
- 1 cup cherry preserves (filling)
- 3 cups unsalted butter, room temp
- 9 cups powdered sugar
- 1/2 cup cocoa powder (Dutch-process)
- 1/3 cup heavy cream
- 1 tsp vanilla extract
- 1/2 tsp fine salt
- Gel colors: bright red, soft white (tiny drop of ivory), dusty rose
- Maraschino or cocktail cherries with stems
Instructions:
- Prep layers. Level cakes. Brush each cut surface lightly with cola for moisture and a cola-cherry note.
- Make two buttercreams. Beat 2 cups butter with 6 cups sugar, salt, cream, and vanilla. Split in half: leave one white; tint the other dusty rose. For chocolate, beat 1 cup butter with 3 cups sugar + cocoa + a splash more cream until fluffy.
- Fill and crumb. Pipe a dam of chocolate buttercream. Spread cherry preserves inside. Top with second layer. Crumb coat in chocolate. Chill 20 minutes.
- Final coat. Smooth a thin chocolate finish. Chill 10 minutes so ruffles grip.
- Whipped ruffle border. Use white buttercream in a petal tip (Wilton 104). Hold narrow end inward, wide end outward. Pipe ruffles around the top edge with a gentle wiggle. Repeat a second ring in dusty rose just inside the first for a stacked look.
- Lambeth accents. Using a small star tip (21), add tight mini shell swags between ruffles. Pipe tiny rosettes at points.
- Cherry crown. Pipe a nest of chocolate rosettes in the center; perch 5–7 cherries with stems on top. Dab stems dry first so they don’t bleed.
Serve like a diner sundae: Chill 15 minutes before slicing to protect the ruffles. Variation: Swap cherry for raspberry and top with chocolate curls. Tip: Keep your petal tip clean—wipe every 2–3 inches to keep ruffles crisp.
3. Lace-And-Bow Engagement Heart (White-On-White Lambeth)
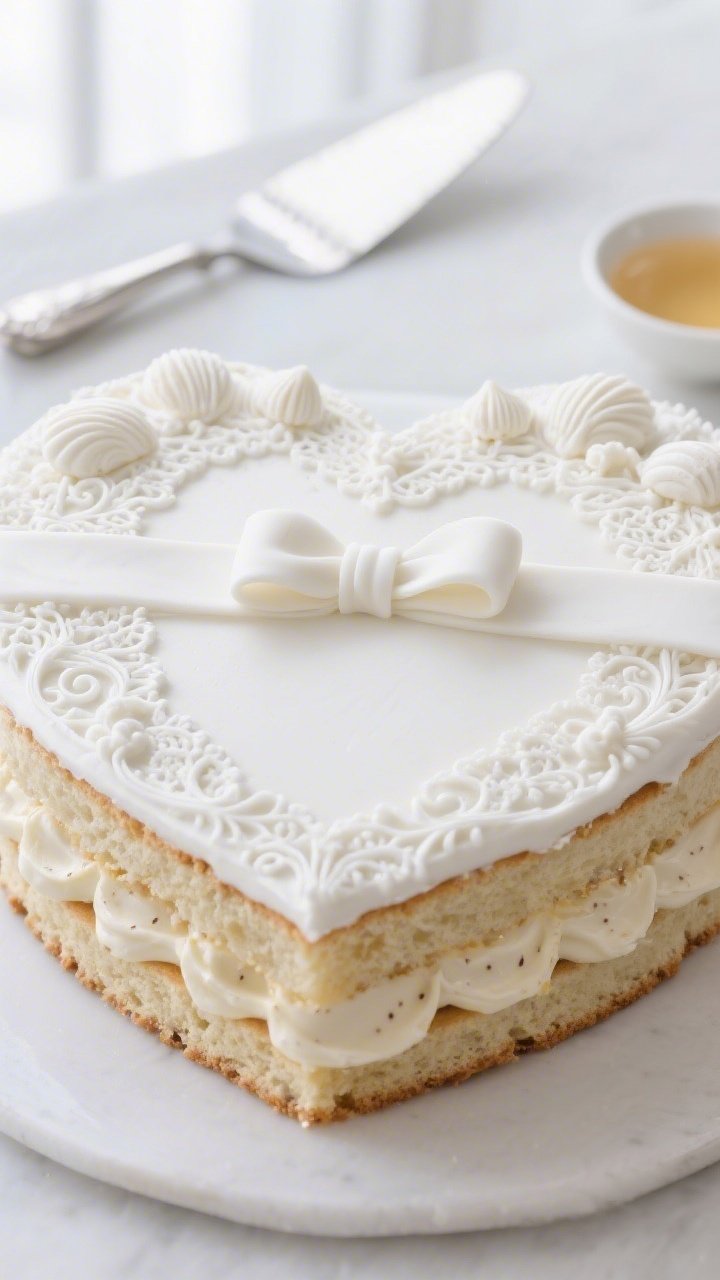
If you want pure elegance, go white-on-white. This design leans into delicate Lambeth overpiping that looks like sugar lace, finished with a fondant bow. It’s quietly dramatic and perfect for showers or proposals.
Ingredients:
- Two 8-inch heart-shaped almond cakes
- 1/2 cup simple syrup (1:1 sugar to water), cooled
- 1 1/2 cups vanilla bean pastry cream or stabilized whipped cream (filling)
- 3 cups unsalted butter, room temp
- 9–10 cups powdered sugar
- 1/3–1/2 cup heavy cream
- 2 tsp vanilla bean paste
- 1/4 tsp almond extract
- Pinch fine salt
- White gel color (to brighten) and a drop of ivory (for contrast if desired)
- 8 oz white fondant (for bow)
- Edible silver dragees (optional)
Instructions:
- Moisten and fill. Level cakes. Brush cut sides with simple syrup. Pipe a buttercream dam; fill center with pastry cream or stabilized whipped cream. Stack and chill 20 minutes.
- Buttercream smoothing. Beat butter, sugar, salt, cream, vanilla, and almond until glossy and firm but pipeable. Tint a bright white with a micro-drop of ivory if you want dimension. Crumb coat and chill. Apply a silky final coat and chill again 15 minutes.
- Base borders. With a star tip (18), pipe a neat bottom shell border. For the top rim, pipe a small beaded border using a round tip (3).
- Lambeth overpiping. Using round tip (2), pipe delicate S-scrolls on the top surface in mirrored pairs. Allow 2–3 minutes to crust. Pipe a second pass directly over the first line for a raised lace effect. Add tiny tear-drops and dots to fill negative space.
- Side swags. Mark even points along the side. With star tip (13), pipe shallow U-shaped swags; overpipe a second, thinner line using round tip (1) for definition. Add a mini star at each joint; press a small dragee if using.
- Fondant bow. Roll fondant, cut two 1.5-inch-wide strips. Form loops with tissue tucked inside to hold shape; pinch centers. Make tails with V-cut ends. Assemble bow on top center using a dab of buttercream. Remove tissues once set.
Serve with sparkle: Keep it monochrome or add pale pearl dust for a soft sheen. Variation: Swap pastry cream for lemon curd if you want tang against almond. Tip: Overpiping needs firm buttercream—pop the bag in the fridge for 2–3 minutes if lines get droopy.
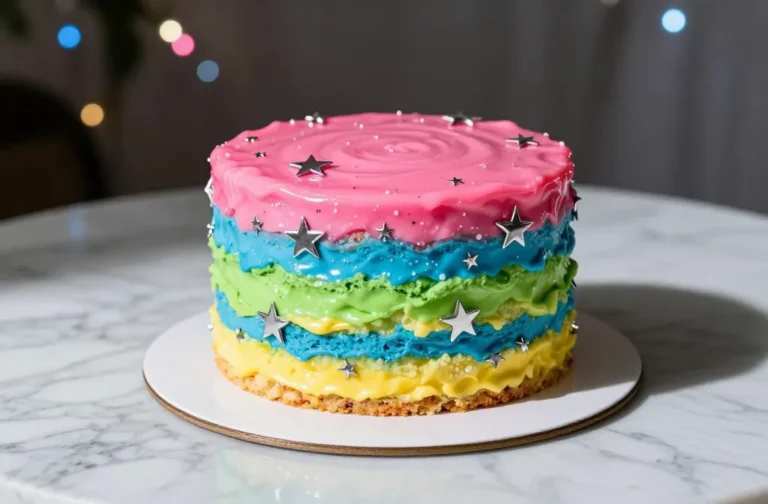
4. Neon Y2K Heart With Triple Borders And Glitter Letters
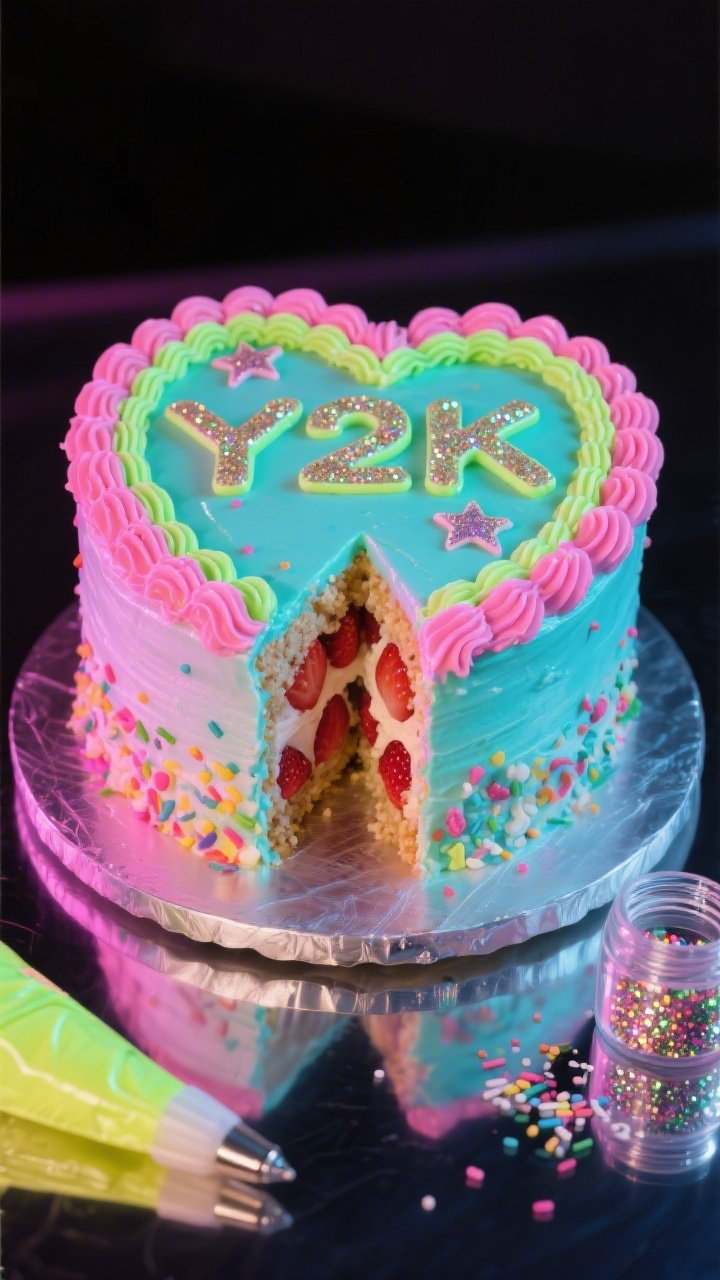
Maximalist and proud. This is the bold, nostalgic internet cake—hot colors, triple borders, and chunky piping that screams party. It photographs like a dream and tastes even better.
Ingredients:
- Two 7-inch heart cakes (funfetti or vanilla)
- 1 cup strawberry buttercream for filling
- 3 cups unsalted butter, room temp
- 10 cups powdered sugar
- 1/2 cup heavy cream
- 2 tsp clear vanilla
- Pinch salt
- Gel colors: electric pink, teal, sunshine yellow, lime
- Edible glitter or luster dust (approved for consumption)
- Sprinkles: star quins and mini hearts
Instructions:
- Stack it. Level layers. Fill with strawberry buttercream. Crumb coat in pale pink. Chill 20 minutes. Final coat in electric pink; smooth but don’t fuss—borders will cover edges.
- Tint three bold shades. Divide remaining buttercream into teal, yellow, and lime. Keep a small batch white for lettering.
- Triple-border action.
- Bottom border: large open star tip (1M) in teal—pipe big shells around the base.
- Mid border: French star tip (4B) in yellow—pipe rope border just above the teal.
- Top rim: small star tip (18) in lime—tight zigzag for texture.
- Lambeth pop. Between the teal shells, add mini stacked dots using round tip (4) in yellow, then overpipe smaller lime dots on top. It’s depth without fuss.
- Center message. With round tip (3) and white buttercream, pipe chunky bubble letters (e.g., “Bestie!”). While still tacky, dust lightly with edible glitter. Tap off excess.
- Confetti finish. Press star and heart sprinkles at random around the top and a few down the sides.
Serve loud: Slice with a hot knife for clean edges. Variation: Do a color-block look—half the borders one color, half another. Tip: For tall, puffy shells, release pressure before lifting so each shell ends crisp, not stringy.
5. Strawberry Milk Tea Heart With Ribbon Garlands And Cameo
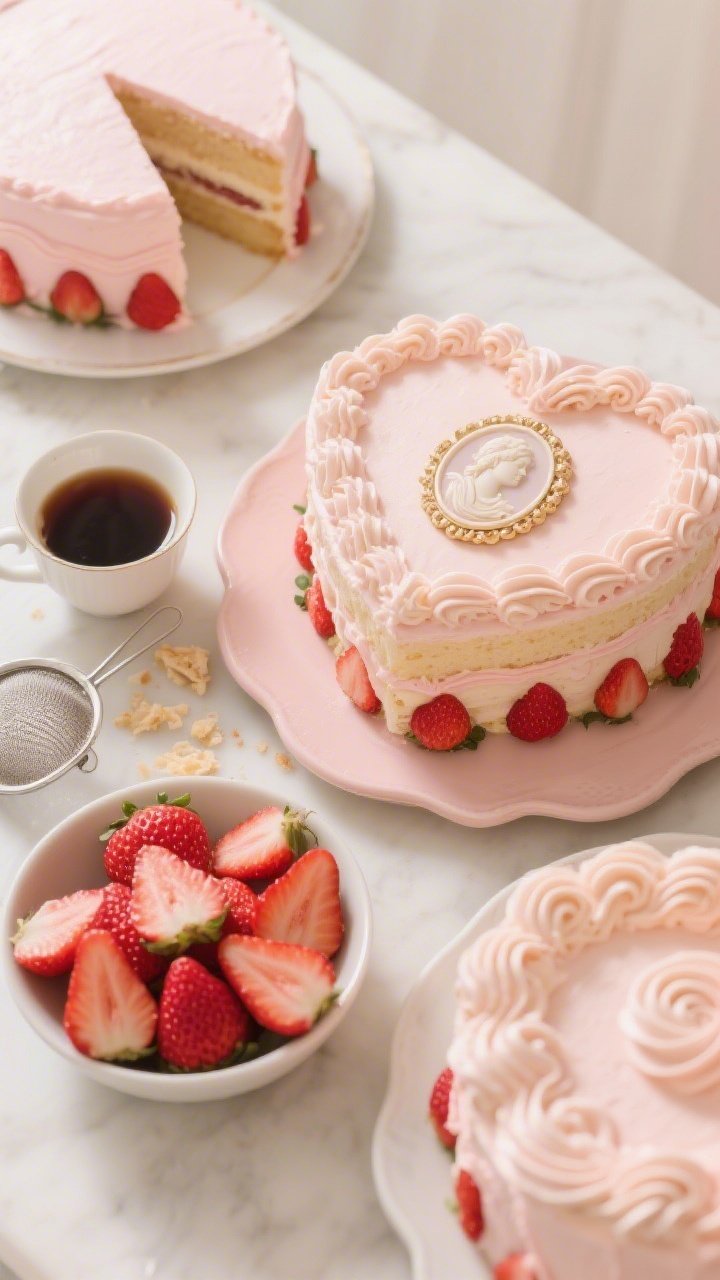
Soft, romantic, and just a little extra. This design layers tea-infused strawberry cake, silky milk-tea buttercream, and classic ribbon garlands with a vintage cameo centerpiece. It’s the cake equivalent of a thrifted silk blouse—in the best way.
Ingredients:
- Two 8-inch heart-shaped strawberry cakes
- 1/2 cup strong milk tea (cooled; steep black tea in hot milk, then sweeten lightly)
- 1 cup sliced strawberries, patted dry
- 3 1/2 cups unsalted butter, room temp
- 10–11 cups powdered sugar
- 1/2 cup milk tea (for buttercream)
- 1 tsp vanilla
- 1/4 tsp salt
- Gel colors: antique rose, sage green, cameo blue
- Edible wafer paper or fondant for cameo oval
- Edible paint or food marker (optional)
Instructions:
- Infuse and prep. Brush each cake layer with 2–3 tbsp milk tea. Don’t soak—just a kiss of flavor. Layer with a thin coat of buttercream and a single layer of dried strawberry slices. Chill 15 minutes.
- Buttercream. Beat butter until fluffy. Add sugar, salt, vanilla, and milk tea until smooth and medium-stiff. Tint 60% antique rose, 30% sage, 10% cameo blue.
- Coat and smooth. Crumb coat in antique rose; chill. Final coat and smooth softly—no need for mirror perfection here; texture is charming.
- Ribbon garlands. Fit petal tip (104) with sage buttercream. Hold narrow end up, wide end against cake. Pipe ribbon swags around the sides, letting the ribbon flutter slightly for dimension. Add small ribbon “ties” at swag joints.
- Cameo center. Cut a small oval from wafer paper or fondant. Paint or draw a simple silhouette (profile or blooming rose) with edible color. Press it gently into the top center with a dab of buttercream.
- Overpiped frame. Using round tip (2) in cameo blue, pipe a beaded oval frame around the cameo. Overpipe a second, smaller bead line just inside for that classic Lambeth lift.
- Finish with borders. Pipe a delicate top shell border in sage and a bottom rope border in antique rose. Add a few tiny drop flowers (star tip 14) around the cameo.
Serve with tea: This one shines slightly chilled so the milk-tea notes are clear. Variation: Swap strawberries for lychee or peach. Tip: Keep fresh fruit slices thin and dry to avoid slippage under the buttercream.
Lambeth Piping Secrets You’ll Actually Use
Let’s demystify the fancy stuff so your hands relax and your lines look luxe.
- Consistency is king: You want medium-stiff buttercream for borders and overpiping. If it’s too soft, add powdered sugar; too stiff, add 1 tsp cream at a time.
- Crusting is your friend: Let piped lines sit 2–3 minutes before overpiping, so the second layer stands proud instead of melting in.
- Tip sizes matter: Small round tips (1–3) for fine lines, small star tips (13–21) for shells and rosettes, petal tips (101–104) for ruffles and ribbons, and big star tips (1M, 4B) for drama.
- Angle and pressure: Hold your bag at 45 degrees for shells and swags, 90 degrees for rosettes. Keep pressure steady; release before lifting to get clean ends.
- Practice panel: Pipe on parchment, scrape back into the bowl, repeat. Ten minutes here saves your cake later—seriously.
Base Cake And Buttercream Cheat Sheet
Use your favorite recipes or reliable box mixes. The magic is in the assembly and piping. For a steady base, aim for two heart layers about 1–1.5 inches tall each. Chill between every major step—crumb coat, final coat, and big borders.
Color Tips For That Vintage Glow
- Pastels: One toothpick dip of gel color at a time. Buttercream deepens as it sits.
- Monochrome magic: Same hue, three intensities. It looks fancy with zero stress.
- Glossy cherries and pearls: Pat fruit dry; add pearls at the end so they don’t sink.
Tools You’ll Want
- Heart cake pans (7–8 inch)
- Turntable, offset spatulas (small and large), bench scraper
- Piping bags (disposable), couplers, and tips: 1, 2, 3, 13–21, 4B, 1M, 101–104
- Edible glitter/pearls, gel colors, and a ruler or toothpick for marking even swags
These five viral vintage heart cake designs are total showstoppers, but they’re also wonderfully forgiving. The Lambeth secret isn’t perfection—it’s layers of texture and a confident hand. Pick one design, practice a few swags on parchment, and then go for it. Your feed—and your friends—are about to be very, very happy.
Printable Recipe Card
Want just the essential recipe details without scrolling through the article? Get our printable recipe card with just the ingredients and instructions.