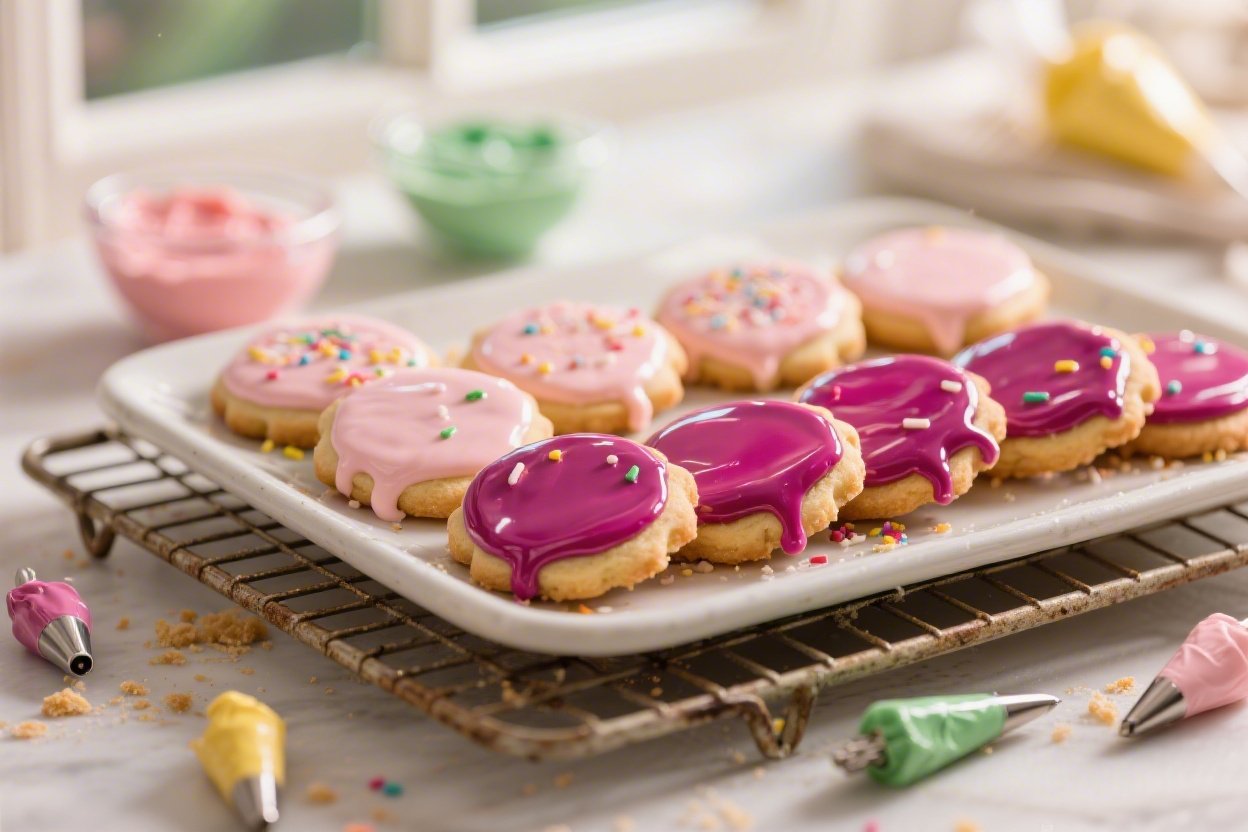

Let’s be honest: the cookie is the canvas, but the icing is the art. If you’ve ever battled streaks, dents, or sticky surfaces, you’re about to level up. These five sugar cookie icing ideas dry smooth, shiny, and ready for stacking, gifting, or showing off on Instagram. They’re simple, dependable, and seriously fun to use—no pastry school required.
1. Classic Royal Icing That Sets Like Glass (Decorator’s Best Friend)
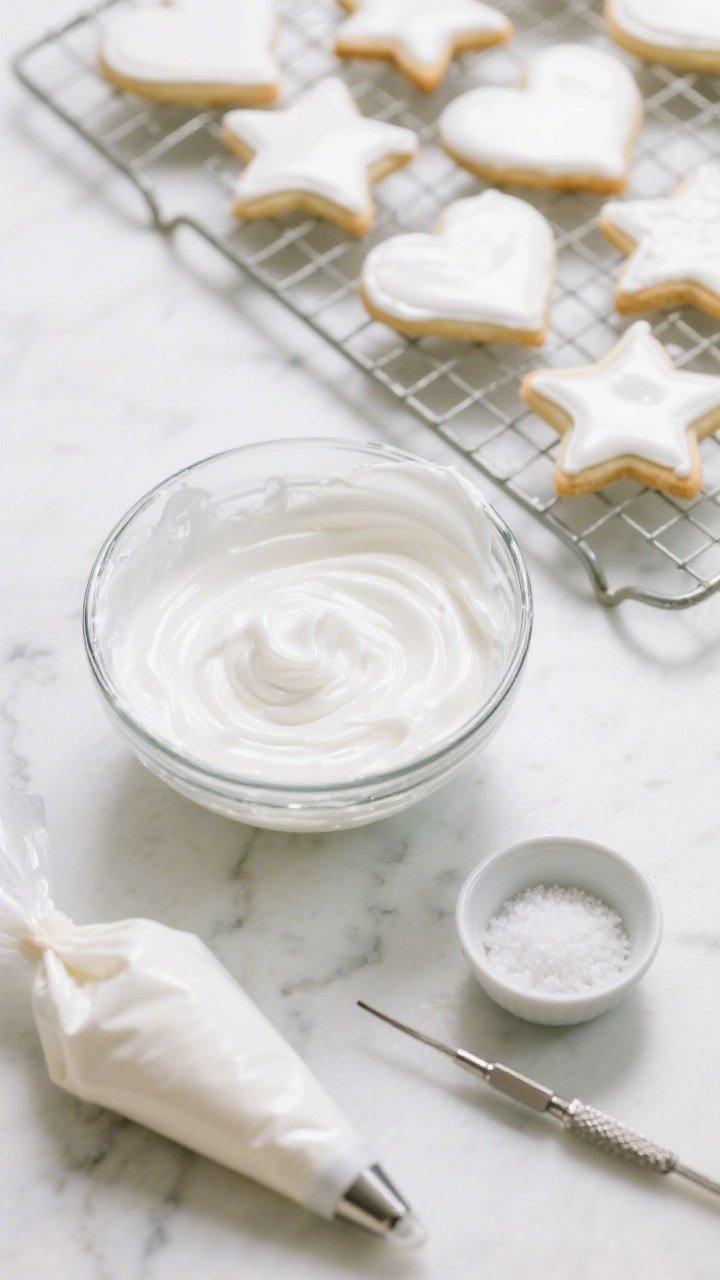
This is the OG cookie icing—super glossy, quick-drying, and crisp once set. It’s perfect for intricate piping, sharp outlines, and those flawless floods that make your cookies look bakery-professional. Make it thick for outlines, thin it a little for flooding, and get ready for magic.

Ingredients:
- 4 cups (480 g) powdered sugar, sifted
- 3 tablespoons meringue powder
- 6–8 tablespoons warm water, plus more as needed
- 1 teaspoon pure vanilla extract (or 1/2 tsp almond extract)
- 1/8 teaspoon fine salt
- Gel food coloring (optional)
Instructions:
- In a stand mixer bowl, whisk powdered sugar and meringue powder to combine. Add 6 tablespoons warm water, vanilla, and salt.
- Beat on low until moistened, then on medium speed for 2–3 minutes until thick, glossy, and slightly stiff. You want soft peaks—not dry and clumpy.
- Adjust consistency:
- Outline consistency: About toothpaste-thick. Add more powdered sugar if needed.
- Flood consistency: Thin with water a few drops at a time. Aim for a 10–12 second ribbon that disappears back into itself.
- Divide and color with gel coloring (a little goes a long way). Keep bowls covered with a damp towel to prevent crusting.
- Pipe outlines, then flood. Use a scribe tool or toothpick to pop bubbles and smooth the surface.
- Let dry uncovered at room temperature 6–8 hours or overnight until completely hard and shiny.
Pro tip: Humidity is the enemy. If your air is damp, place a small fan nearby (not directly on the cookies) to encourage that glassy finish. Add 1 teaspoon light corn syrup for extra shine if you like.
2. Shiny Glacé Icing With Corn Syrup (Soft Bite, Glassy Glow)
Want mirror-like shine without meringue powder? This corn syrup glacé is your girl. It dries smooth and stackable, but the bite stays softer than royal—like a glossy candy shell that doesn’t crack too hard. Great for kids’ cookies and big batches.
Ingredients:
- 3 cups (360 g) powdered sugar, sifted
- 3 tablespoons light corn syrup
- 4–6 tablespoons milk (dairy or unsweetened almond), room temp
- 1 teaspoon vanilla extract (or 1/2 tsp almond extract)
- Pinch fine salt
- Gel food coloring (optional)
Instructions:
- Whisk powdered sugar, corn syrup, 4 tablespoons milk, vanilla, and salt until smooth and glossy.
- Adjust thickness: add milk by the teaspoon to thin for flooding, or powdered sugar to thicken for outlining. You’re aiming for a slow-flowing glaze that levels itself in 10–15 seconds.
- Color as needed with gel coloring. Keep covered—this crusts faster than you think.
- Outline your cookie with a slightly thicker mix, then flood with a thinner mix. Use a scribe to nudge icing into corners and pop bubbles.
- Dry 12–18 hours at room temp for a firm, shiny surface. It will be stackable when fully dry.
Serving/variations: Add 1/4 teaspoon lemon juice for a bright finish. For deeper shine, mix in 1/4 teaspoon glycerin (optional). Sprinkle immediately if you want decorations to stick; once it crusts, sprinkles will bounce right off.
3. No-Meringue Royal Icing (Egg-Free, Ultra Smooth, Fast-Drying)
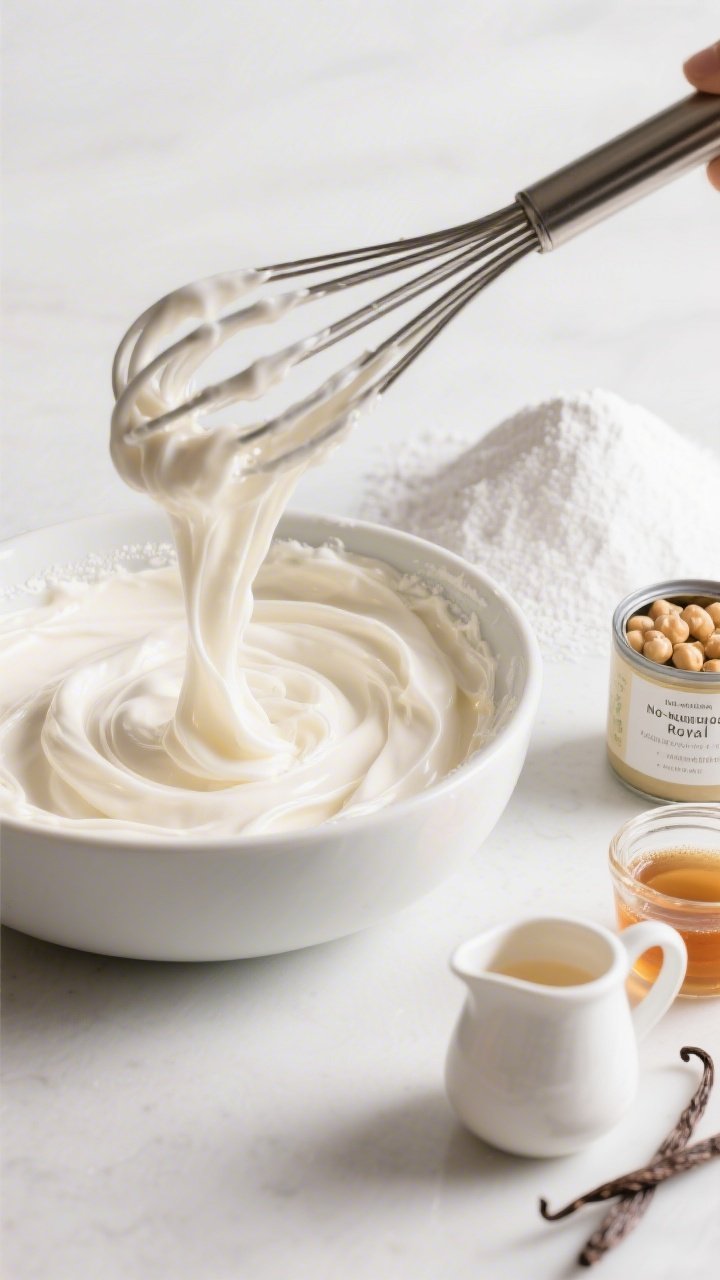
No meringue powder? No problem. This egg-free spin uses pasteurized aquafaba (chickpea liquid) for structure, so it behaves like royal icing without the fuss. It dries smooth, shiny, and surprisingly sturdy—ideal if you want clean lines and quick drying time.
Ingredients:
- 4 cups (480 g) powdered sugar, sifted
- 6 tablespoons aquafaba (liquid from canned chickpeas), room temp
- 1–2 tablespoons warm water, as needed
- 1 teaspoon vanilla or 1/2 teaspoon almond extract
- 1/8 teaspoon fine salt
- Gel food coloring (optional)
Instructions:
- In a mixing bowl, beat aquafaba for 30–60 seconds until slightly frothy.
- Add powdered sugar, vanilla, and salt. Mix on low to combine, then medium for 1–2 minutes until thick, glossy, and smooth.
- Adjust with a splash of water for flood consistency (10–12 second ribbon). For outlines, keep it thicker.
- Color with gel coloring. Keep covered to avoid crusting.
- Pipe outlines, then flood. Smooth with a scribe tool. Tap the cookie gently to help bubbles rise.
- Dry 6–10 hours until firm and shiny. It sets a touch softer than traditional royal but still stackable once fully dry.
Pro tip: Aquafaba varies by brand. If your icing feels loose, whisk in an extra 1–3 tablespoons powdered sugar. For a satiny finish, add 1 teaspoon light corn syrup—trust me, it’s gorgeous.
4. Glossy Dip Icing for Crowd Batches (Dunk, Drip, Dazzle)
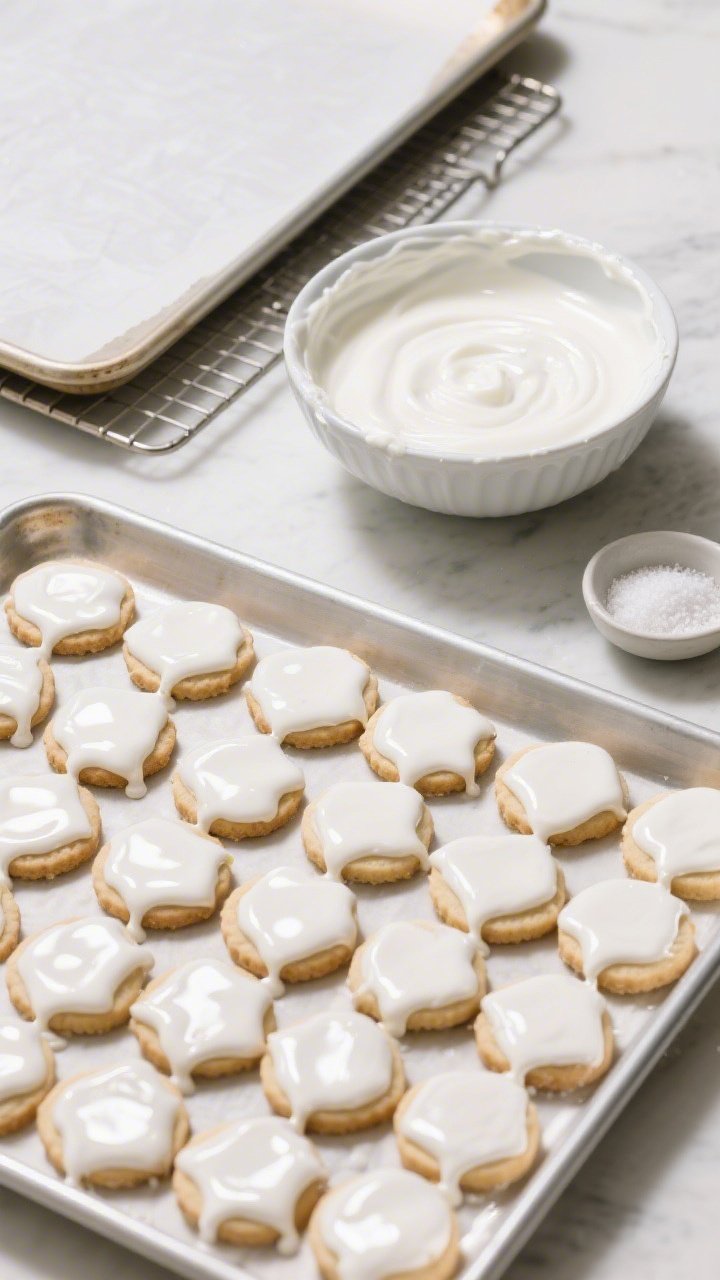
When you’re frosting dozens of cookies and want a uniform, shiny finish, this dip icing is your secret weapon. It’s silky, self-leveling, and made for speed: just dunk, swipe the edge, and watch the shine appear. Perfect for party platters and holiday tins.
Ingredients:
- 3 1/2 cups (420 g) powdered sugar, sifted
- 3 tablespoons light corn syrup
- 1/2 teaspoon vanilla extract + 1/4 teaspoon almond extract (optional but dreamy)
- 5–7 tablespoons warm water
- Pinch fine salt
- Gel food coloring (optional)
Instructions:
- Whisk powdered sugar, corn syrup, vanilla, salt, and 5 tablespoons warm water until smooth and pourable.
- Color as desired. Aim for a thick glaze that flows like heavy cream and levels in about 8–10 seconds.
- Hold a cookie by the edges and dip the top surface into the icing. Lift, allow excess to drip for 2–3 seconds, then swipe the edge on the bowl’s rim.
- Set on a rack or parchment. If you see bubbles, tap the cookie gently or pop with a toothpick right away.
- Dry 8–12 hours for a smooth, shiny surface. Add sprinkles within 5–10 minutes of dipping if you want them to stick.
Variations: Split the icing into bowls and tint in a gradient for an ombré tray. For marbling, drizzle a second color over the surface of your dip bowl, then dunk and twist slightly—instant art.
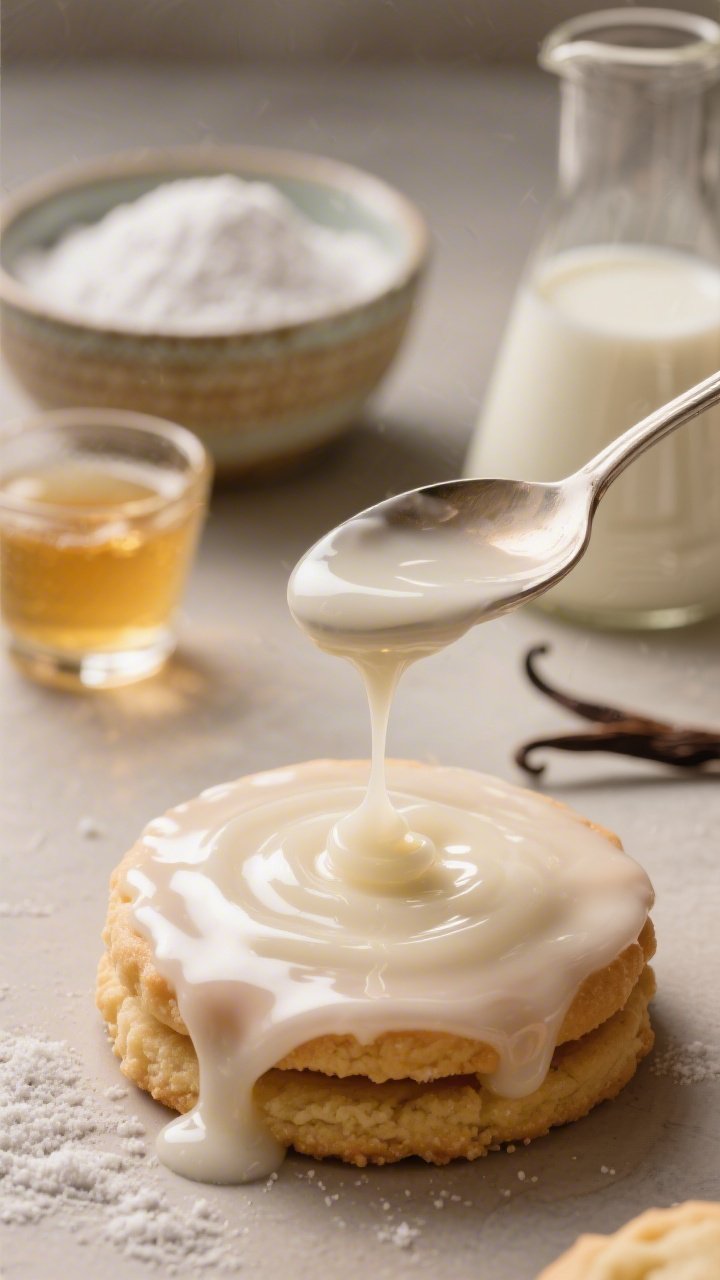
5. Luxe Vanilla Bean Icing With A Candy-Coat Shine (Soft-Set, Elegant Finish)
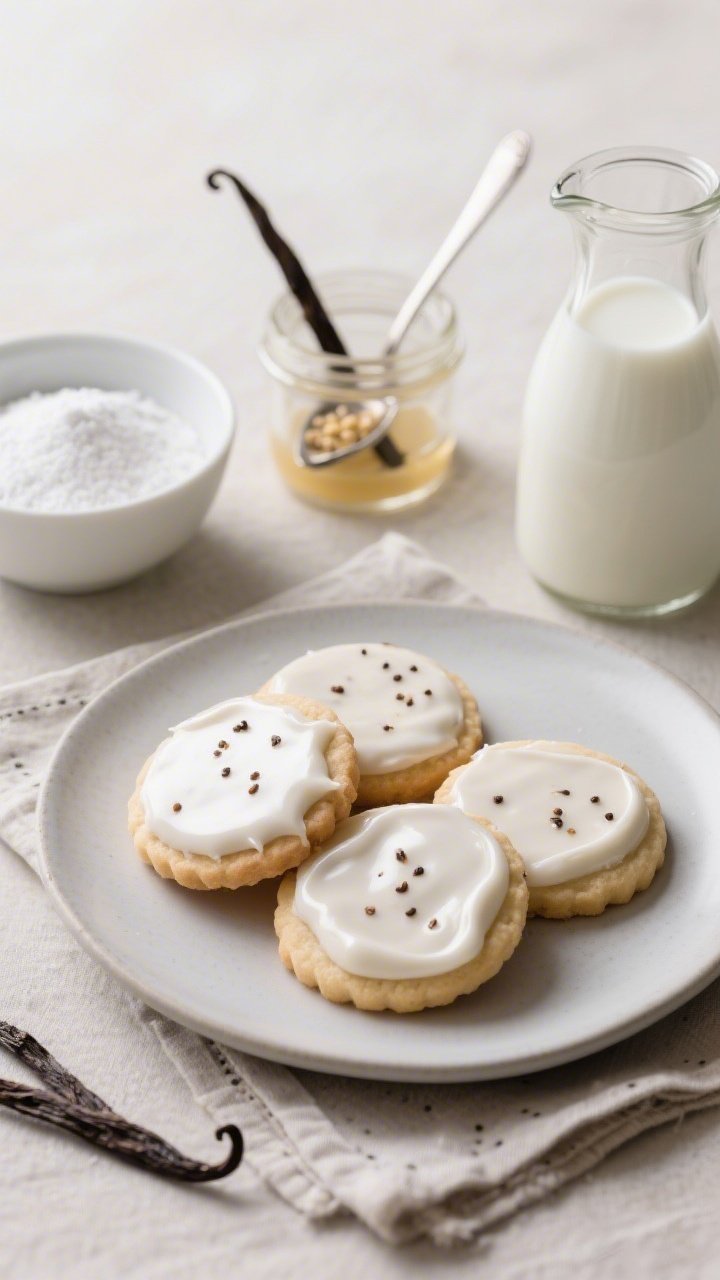
When you want that high-end bakery vibe, this vanilla bean icing brings the glam. A touch of glycerin helps it dry extra shiny while staying tender under the surface. It pipes cleanly, floods like a dream, and tastes like a sugar cookie’s soulmate.
Ingredients:
- 3 3/4 cups (450 g) powdered sugar, sifted
- 3 tablespoons light corn syrup
- 1 teaspoon pure vanilla bean paste (or seeds from 1/2 vanilla bean)
- 4–6 tablespoons milk (room temp)
- 1 teaspoon vegetable glycerin (optional but boosts shine)
- Pinch fine salt
- Gel food coloring (optional)
Instructions:
- In a bowl, whisk powdered sugar, corn syrup, vanilla bean paste, 4 tablespoons milk, glycerin, and salt until silky and speckled with vanilla.
- Adjust to desired thickness: thicker for outlines, thinner for flooding. You’re looking for a 10–12 second consistency for smooth, even coverage.
- Color as desired. The vanilla flecks show through light colors and look stunning.
- Pipe outlines first, then flood. Use a scribe to smooth and clean the edges.
- Let dry 10–14 hours until the surface is shiny and firm. The interior will keep a delicate bite.
Serving/variations: Pair with citrus-zest cookies or brown butter sugar cookies for a bakery-level upgrade. For a pearly finish, lightly brush dried cookies with luster dust mixed with a drop of clear alcohol.
How To Nail That Smooth, Shiny Dry Every Time
These quick tips apply to all five icings and will save you from sad, cratered cookies.
- Use room temp cookies. Warm cookies cause icing to run; cold ones can lead to dullness and bubbles.
- Sift your powdered sugar. Lumps = streaks. Don’t skip.
- Mind the consistency. The “seconds test” is everything. Too thin floods off the edge; too thick won’t self-level.
- Pop bubbles ASAP. Tap the cookie or use a scribe/toothpick right after flooding.
- Dry with airflow. A small fan nearby gives that glassy set. Avoid humidity if possible.
- Avoid grease. Oil kills shine and structure. Use clean, grease-free bowls, tips, and bags.
- Color with gel, not liquid. Liquids thin icing and can dull the finish.
Decorating Order For Crisp Lines
Want those sharp edges and layered designs?
- Outline first. It’s your barrier to prevent flooding off the cookie.
- Flood second. Fill quickly so it self-levels evenly.
- Wet-on-wet for patterns. Add dots or lines immediately to create hearts, chevrons, or marbling.
- Wet-on-dry for layers. Let the base dry 2–4 hours before adding details for raised textures.
Storage And Make-Ahead Tips
- Room temp: Most of these icings keep 1–2 days in airtight containers. Press plastic wrap directly onto the surface to prevent crusting.
- Re-mix before using: Icing separates as it sits. Stir gently to avoid air bubbles.
- Decorated cookies: Once fully dry, store between parchment sheets in airtight tins for up to a week. They actually get better on day two.
Flavor Boosters You’ll Love
- Almond extract: Classic bakery flavor—use sparingly.
- Lemon or orange zest: Mix a pinch into the icing for a bright lift.
- Maple or vanilla bean: Cozy, fragrant, and elegant—seriously, so good.
That’s your shiny cookie toolkit—five reliable, glossy icings that dry like a dream and make your bakes look next-level. Pick your vibe (crisp royal, soft-gloss glacé, or luxe vanilla bean), grab some gel colors, and get decorating. Your cookie platter is about to steal the show—trust me, you’ll have people asking for your “bakery” details.
Printable Recipe Card
Want just the essential recipe details without scrolling through the article? Get our printable recipe card with just the ingredients and instructions.